
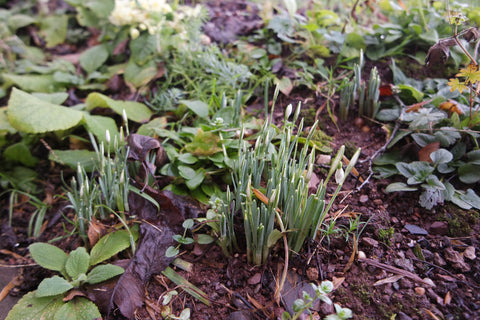
Another day another blog post. It has seemed to stop raining for days, Devon is very squelchy under foot, but still I am looking towards the earth for signs of Spring
Perhaps some of you are wondering whether to get out your watercolours, perhaps the washing up is calling you instead, or you have a pile of ironing to do...In my experience, I think if you give yourself permission to do something just for you, it will be ok. So I thought I would revisit a simple snowdrop, perhaps entice some of you to have a go.
It involves negative painting as the snowdrop is white, so the background helps to describe the shape of the flower. It will become more apparent as I show you what I have done. I have only painted one snowdrop but you can do as many as you like.
Here goes.....
Firstly sketch the outline of your flower

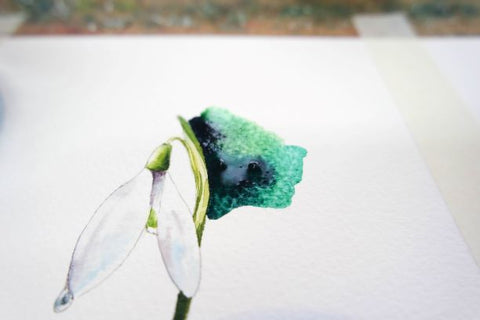
I have added a little drop of water.

I painted this first, just a touch of cerulean blue and paynes grey. Just paint exactly what you see and don't worry that it is water . I am using my very smallest brushes that come to a lovely sharp point so I can control the paint.
Now to add the details of the flower , the tiny green splash between the petals, done with lemon yellow and then a darker sap green

Now to add some shading , between those petals with a shadow colour made up of cadmium red and cobalt blue, and paint the top of the flower, with lemon yellow, moving into darker greens . Don't forget the tiny stem.

Now to subtlety move onto the petals, I just use a very pale cerulean blue and the shadow colour ( above) to suggest shape. I wet the petals first, you just need a touch of colour.

Now for the rest of the greenery, making sure i add lights and darks where I see them on the flower stem.

Now if you aren't feeling brave, or you are happy with it, you can leave your snowdrop just like that. But if you want to you can now add an exciting background, and the darker the colour next to the whitest part of the flower, then the brighter it will appear. Keep the puddle you are working from wet, then I dropped in indigo and intense phthalo green and blue. Also some Indian yellow, keep moving but control the paint, and try not to go over the lines.
Keep moving and if you want to sprinkle a little table salt into the wet paint. This adds a frosty texture.
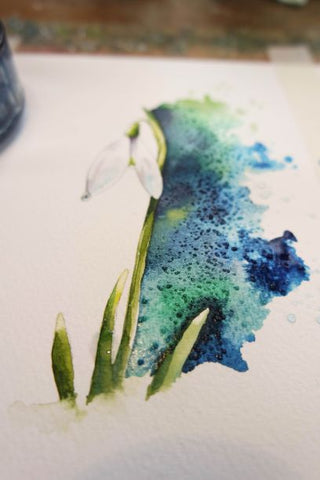
Go all around the flower , I sprayed the edges of the colour because I wanted the edges to be lost. But your in control ( hopefully so do what feels right)

You can see where the salt is starting to react. Now when you are happy, stop !
Leave it, let it settle down and come back when it is dry.
You can try this with just one colour, or different colours.
Have fun with backgrounds enjoy the contrasts.
Remember it's only paper and paint, have fun and enjoy the magic.
Happy Springtime x
7 comments
Good morning Rachel I have just discovered your page as I was looking for new inspiration on daisies, a flower that I love. Fresh as a daisy, is a fantastic replica plus the background you put in after something that I have never done but …. practice. Thank you for your website. Susan
I just discovered you Rachel and I am blown away with your beautiful paintings and that you so generously share your techniques. Thanks so much!!
I haven’t seen your blog before!! I was looking for some penguin inspo and found all kinds of great little tutorials. Thanks so much for sharing your ideas and process.
Thank You so much Rachel , this is beautiful. I’m going to give it a go.
This is beautiful. It’s so generous of you to share your process. I’m going to have a go.